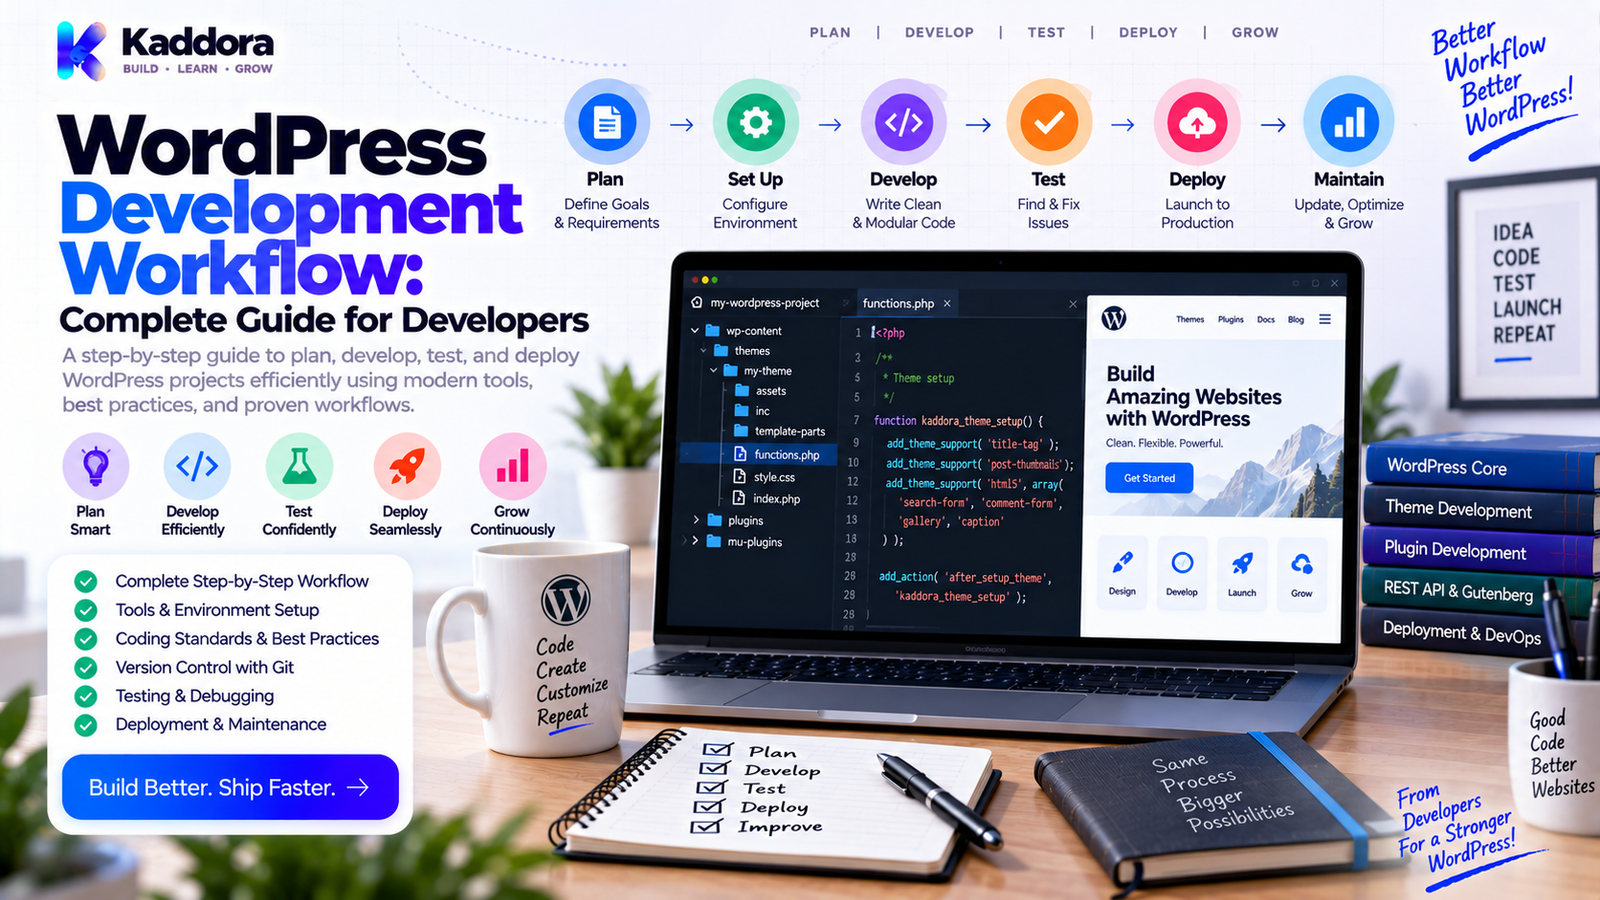
WordPress Development Workflow: A Complete Guide for Developers
Introduction
A successful WordPress project is not built by writing code alone.
Professional development requires a repeatable process for turning an idea into working, tested, secure, and maintainable software.
Without a defined workflow, developers may experience:
Unclear requirements
Unorganized code
Difficult debugging
Accidental production changes
Missing tests
Security issues
Deployment mistakes
Difficult maintenance
A strong WordPress workflow creates a predictable path:
Plan
↓
Develop
↓
Test
↓
Review
↓
Stage
↓
Deploy
↓
Monitor
The workflow can be adapted for a:
WordPress website
Custom theme
WooCommerce extension
REST API integration
AI-powered plugin
The goal is not to introduce unnecessary process.
The goal is to make development more reliable.
This guide explains how to create a practical WordPress development workflow from project planning through long-term maintenance.
What Is a WordPress Development Workflow?
A WordPress development workflow is the repeatable process used to design, build, test, release, and maintain WordPress software.
A typical workflow includes:
Requirements
Environment setup
Architecture
Development
Version control
Testing
Code review
Staging
Deployment
Monitoring
Maintenance
The exact process depends on project size.
A simple website may need only a lightweight workflow.
A large plugin with multiple developers may require CI, automated testing, dependency management, staging, and controlled releases.
Why a Development Workflow Matters
A repeatable process reduces uncertainty.
For example:
New Feature ↓ Local Development ↓ Automated Checks ↓ Manual Testing ↓ Staging ↓ Production
Without this process, a developer might edit production code directly and discover problems only after users encounter them.
A workflow creates checkpoints.
Each checkpoint provides an opportunity to detect problems earlier.
Step 1: Define Requirements
Before writing code, define the problem.
Ask:
What needs to be built?
Who will use it?
What problem does it solve?
What are the required features?
What is outside the scope?
Which integrations are required?
Which WordPress versions must be supported?
For example:
Feature: Custom Booking System Required: - Services - Staff - Availability - Booking - Notifications Optional: - Payment Integration - Calendar Sync
Clearly separating required and optional functionality prevents unnecessary development.
Step 2: Define Technical Requirements
Once the feature requirements are clear, define technical constraints.
Consider:
Minimum WordPress version
Minimum PHP version
Database requirements
Browser requirements
WooCommerce compatibility
Required plugins
External APIs
Hosting requirements
Don't develop first and discover compatibility requirements afterward.
Set them before implementation begins.
Step 3: Choose the Development Environment
Use a local environment for development whenever practical.
Common approaches include:
Local WordPress installations
Docker-based environments
Virtual machines
Hosting-provided development environments
The local environment should approximate the supported production environment where practical.
Configure:
WordPress
PHP
Database
Required plugins
Theme
Development tools
Step 4: Configure the Environment
Environment-specific settings should remain separate from application logic.
A typical setup is:
Local ↓ Test Database ↓ Test API Credentials ↓ Debugging Enabled Staging ↓ Staging Database ↓ Test Integrations ↓ Production-Like Configuration Production ↓ Live Database ↓ Live Credentials ↓ Controlled Debugging
Never assume local and production should use identical credentials.
Step 5: Initialize Version Control
Use a version control system such as Git for professional projects.
A repository can track:
PHP
JavaScript
CSS
Templates
Configuration templates
Documentation
Tests
A basic workflow might use:
main ↓ feature branch ↓ development ↓ pull request ↓ review ↓ merge
The exact branching strategy should match the team's size and release process.
Step 6: Design the Architecture
Before building a large feature, determine where its responsibilities belong.
For a WordPress plugin, this could be:
Bootstrap ↓ Controllers ↓ Services ↓ Repositories ↓ WordPress APIs / Database
For a theme:
Templates ↓ Template Parts ↓ Theme Setup ↓ Assets ↓ WordPress APIs
Avoid mixing unrelated responsibilities simply because they are convenient to implement in one file.
Step 7: Establish Coding Standards
Decide how the project will handle:
Naming
Formatting
Documentation
PHP
JavaScript
CSS
HTML
Internationalization
Security
For WordPress PHP projects, automated standards checks can help enforce consistency.
For example:
vendor/bin/phpcs --standard=WordPress .
The exact configuration depends on the project's installed tools and standards.
Step 8: Develop in Small Increments
Avoid implementing an entire application before testing anything.
Instead:
Feature ↓ Small Implementation ↓ Test ↓ Review ↓ Continue
For example, instead of building an entire booking system at once:
Create services.
Implement availability.
Add booking logic.
Add validation.
Add notifications.
Add integrations.
Test each stage.
Smaller increments make errors easier to isolate.
Step 9: Use WordPress APIs
Use native WordPress APIs where appropriate.
Examples include:
Settings API
HTTP API
REST API
Metadata API
Options API
Transients API
Cron API
Enqueue APIs
Internationalization APIs
Using WordPress's established APIs improves consistency and usually reduces unnecessary custom infrastructure.
Step 10: Build Security Into Development
Security should be part of implementation, not a final checklist only.
Consider:
Authorization
if ( ! current_user_can( 'manage_options' ) ) { return; }
Nonces
Use them for appropriate state-changing requests.
Sanitization
Clean incoming values according to their intended format.
Validation
Reject invalid data.
Escaping
Escape output for the correct context.
Database Safety
Use prepared queries for dynamic SQL values.
A typical request flow is:
Request ↓ Authorization ↓ Nonce ↓ Validation ↓ Sanitization ↓ Processing ↓ Escaped Output
Step 11: Test as You Build
Testing should happen throughout development.
Don't wait until the project is finished.
Test:
Normal cases
Invalid input
Empty values
Permission failures
Missing dependencies
API failures
Database failures
Different browsers
Mobile layouts
Testing early reduces expensive fixes later.
Step 12: Use Automated Testing Where Practical
Larger WordPress projects can benefit from automated tests.
Possible layers include:
Unit Tests
Test isolated business logic.
Integration Tests
Test components working together.
WordPress Tests
Test behavior against a WordPress environment.
End-to-End Tests
Test complete user workflows.
A useful model is:
Unit ↓ Integration ↓ End-to-End
Not every project needs every level.
Choose testing depth according to risk and complexity.
Step 13: Run Static Analysis
Static analysis can detect potential problems before runtime.
Tools may check:
Coding standards
Type issues
Documentation
Deprecated APIs
Security patterns
JavaScript quality
For PHP projects, PHPCS/WPCS can be part of the workflow.
Static analysis works best when run automatically during development or CI.
Step 14: Review Database Changes Carefully
If a feature changes the database, document:
New tables
New columns
Indexes
Options
Metadata
Migration requirements
Do not treat production database changes as ordinary code edits.
A safe sequence is:
Local Migration ↓ Test ↓ Staging Migration ↓ Verify ↓ Production Migration
For major projects, version database migrations explicitly.
Step 15: Review External Integrations
External systems should be treated as dependencies.
Examples:
Payment gateways
AI services
Email providers
CRM systems
Analytics platforms
Cloud storage
Calendar services
Test:
Authentication
Timeouts
Error handling
Response validation
Rate limits
Retry behavior
Never assume an external service will always respond successfully.
Step 16: Manage Dependencies
Document required:
WordPress version
PHP version
Plugins
Composer packages
JavaScript packages
External services
For Composer-based projects, review:
composer.json composer.lock vendor/
Dependencies should be updated deliberately and tested before production deployment.
Step 17: Use a Staging Environment
Staging provides a controlled environment for final verification.
A good staging environment should resemble production while using isolated services.
Test:
Site navigation
Forms
Authentication
APIs
Emails
WooCommerce
Cron jobs
JavaScript
Responsive behavior
Performance
Staging is especially important before major plugin or theme releases.
Step 18: Perform Code Review
A code review should examine more than formatting.
Review:
Functionality
Does the feature solve the intended problem?
Security
Are data boundaries protected?
Architecture
Are responsibilities clear?
Performance
Are queries and external requests reasonable?
Compatibility
Does the code support the intended environments?
Maintainability
Can another developer understand it?
Code review is particularly valuable for plugins distributed to many websites.
Step 19: Create a Release Checklist
Before deployment, verify:
Tests pass
Coding standards pass
Security reviewed
Dependencies checked
Database changes documented
Documentation updated
Version number updated
Changelog updated
Production configuration reviewed
Backup available
A release checklist prevents small omissions from becoming production issues.
Step 20: Deploy Carefully
Production deployment should be deliberate.
A useful workflow is:
Approved Code ↓ Backup ↓ Build ↓ Deploy ↓ Database Migration ↓ Cache Handling ↓ Smoke Test ↓ Monitor
The exact order may differ depending on the application and migration strategy.
For high-risk changes, have a rollback plan.
Step 21: Perform Smoke Testing
After deployment, test the most important workflows first.
For a business website:
Homepage
Contact form
Login
Main conversion paths
For WooCommerce:
Product
Cart
Checkout
Payment
Order confirmation
For a plugin:
Activation
Settings
Main feature
Admin UI
Frontend behavior
The goal is to identify serious production problems quickly.
Step 22: Monitor Production
Deployment is not the end.
Monitor:
PHP errors
WordPress errors
Server errors
Slow queries
Failed API calls
Cron failures
User-facing errors
Performance
Monitoring helps detect problems that automated tests cannot reproduce.
Step 23: Maintain Documentation
Keep documentation updated with:
Installation
Configuration
Requirements
Architecture
APIs
Database structure
Development setup
Deployment steps
Troubleshooting
Good documentation reduces onboarding time and maintenance cost.
WordPress Plugin Development Workflow
A practical plugin workflow looks like:
Requirements ↓ Architecture ↓ Local Setup ↓ Feature Development ↓ Security ↓ Automated Checks ↓ Tests ↓ Code Review ↓ Staging ↓ Release ↓ Monitoring
This works particularly well for plugins with multiple modules and integrations.
WordPress Theme Development Workflow
A theme workflow may look like:
Design Requirements ↓ Design System ↓ Theme Structure ↓ Templates ↓ Template Parts ↓ CSS / JS ↓ Accessibility ↓ Responsive Testing ↓ Performance ↓ Staging ↓ Release
Themes should be tested across devices and supported browsers.
WooCommerce Development Workflow
WooCommerce projects require additional checks.
A workflow can include:
Feature ↓ WooCommerce API Integration ↓ Product Testing ↓ Cart Testing ↓ Checkout Testing ↓ Payment Testing ↓ Order Testing ↓ Email Testing ↓ Staging ↓ Production
Never test live payments casually.
Use appropriate sandbox or test environments.
WordPress AI Development Workflow
AI-powered plugins need additional considerations.
A practical flow is:
User Input ↓ Validation ↓ AI Service ↓ Provider API ↓ Response Validation ↓ Application Logic ↓ Output
Also review:
API costs
Timeouts
Rate limits
Error handling
Data transmission
Privacy requirements
Provider changes
Never expose private API keys in frontend code.
WordPress REST API Development Workflow
REST integrations should be structured around:
Request ↓ Permission ↓ Validation ↓ Service ↓ Repository / API ↓ Response
Test:
Authentication
Authorization
Invalid input
Missing records
Error responses
Rate limits
Response structure
API contracts should be documented.
WordPress Cron Development Workflow
Scheduled tasks should be tested separately.
For example:
Schedule ↓ Job ↓ Batch Processing ↓ Error Handling ↓ Logging ↓ Completion
Avoid processing massive datasets in one request when batching would be safer.
Monitor failed or repeated jobs.
Git Workflow for WordPress Projects
A practical Git workflow can be:
main │ ├── feature/analytics ├── feature/api └── fix/security ↓ Pull Request ↓ Review ↓ Tests ↓ Merge
Commit messages should communicate what changed.
For example:
Add booking availability validation Fix REST permission handling Improve admin asset loading
Avoid vague messages such as:
update stuff changes fix
Good version history becomes valuable during maintenance.
Development Workflow for Marketplace Plugins
If a plugin will be distributed widely, add extra checks for:
Clean installation
Upgrade from older version
Missing dependencies
Different database prefixes
Supported PHP versions
Supported WordPress versions
Plugin conflicts
Internationalization
Accessibility
Final ZIP package
Test the actual package users will install.
A plugin that works only inside the developer's source directory is not ready for release.
Common WordPress Development Workflow Mistakes
Developing Directly on Production
This increases deployment risk.
Skipping Version Control
Changes become difficult to track.
No Staging Environment
Production becomes the testing environment.
Testing Only the Happy Path
Real users produce invalid and unexpected input.
No Security Review
Functional code may still be unsafe.
No Automated Checks
Simple mistakes can survive until release.
Updating Dependencies Without Testing
A dependency update can introduce unexpected behavior.
No Backup Before Deployment
Rollback becomes difficult.
No Post-Deployment Testing
Problems may go unnoticed.
Poor Documentation
Future maintenance becomes expensive.
A Practical WordPress Development Workflow Checklist
Planning
Requirements defined
Scope documented
Compatibility requirements defined
Dependencies identified
Development
Local environment configured
Version control enabled
Architecture defined
Coding standards applied
Security implemented
Testing
Unit tests where appropriate
Integration tests where appropriate
Manual testing
Browser testing
Mobile testing
Error scenarios tested
Staging
Production-like environment
Test credentials
Backup available
Database changes tested
External integrations tested
Release
Code review complete
Static analysis complete
Dependencies reviewed
Documentation updated
Version updated
Release package tested
Production
Backup confirmed
Deployment completed
Migration verified
Smoke tests passed
Monitoring enabled
How to Improve a WordPress Development Workflow
A workflow can become better over time.
Start by identifying repeated problems.
For example:
Problem: Developers forget compatibility testing.
Improvement: Add compatibility checks to CI.
Or:
Problem: Production deployments occasionally miss files.
Improvement: Build the release package automatically and test the package in a clean environment.
Or:
Problem: Bugs are discovered after deployment.
Improvement: Add staging and automated regression tests.
Continuous workflow improvement is often more valuable than creating a complicated process from the beginning.
Why Choose ThemeKaddora?
ThemeKaddora provides WordPress plugins, themes, WooCommerce solutions, AI tools, analytics products, marketing tools, automation solutions, HTML templates, UI kits, and SaaS-focused digital products.
For professional digital products, a repeatable development workflow helps maintain:
Code quality
Security
Compatibility
Performance
Testing
Documentation
Deployment consistency
ThemeKaddora-style WordPress products can benefit from workflows that separate local development, staging, and production while using controlled dependencies, secure configuration, automated checks, and structured release processes.
The goal is not to create unnecessary bureaucracy.
The goal is to make every release more predictable.
Final Thoughts
A professional WordPress development workflow gives developers a repeatable path from idea to production.
The core process is:
Plan
↓
Configure
↓
Develop
↓
Test
↓
Review
↓
Stage
↓
Deploy
↓
Monitor
Each stage protects the next.
Planning prevents unclear requirements.
Local development protects production.
Version control preserves history.
Architecture keeps code organized.
Security controls protect data.
Testing catches defects.
Code review improves quality.
Staging reduces deployment risk.
Monitoring reveals production issues.
Documentation preserves knowledge.
The best workflow is not necessarily the most complicated one.
It is the workflow that fits the project and is followed consistently.
For a small WordPress website, that may mean local development, Git, manual testing, staging, and a simple release checklist.
For a large WordPress plugin or SaaS-connected application, the workflow may include automated tests, dependency management, CI/CD, database migrations, security checks, integration testing, and monitoring.
Start with a simple process.
Automate repetitive checks.
Document important decisions.
Measure where problems occur.
Then improve the workflow based on real development needs.
A strong WordPress workflow doesn't simply help developers write code faster.
It helps them build software more safely, release it more reliably, and maintain it more effectively over time.
Frequently Asked Questions
What is a WordPress development workflow?
It is the repeatable process used to plan, build, test, review, deploy, monitor, and maintain WordPress software.
Why is a development workflow important?
A structured workflow reduces deployment mistakes, improves code quality, supports security, and makes development more predictable.
Should WordPress development happen directly on production?
Generally no. Local and staging environments provide safer places to build and test changes.
What is the difference between local, staging, and production?
Local is used for development, staging is used for production-like testing, and production is the live environment serving real users.
Should local and staging use production credentials?
Generally no. Use test or sandbox credentials whenever the service provides them.
What is staging in WordPress development?
Staging is a separate environment designed to reproduce production behavior safely before changes are released to live users.
Should staging be identical to production?
It should be similar enough to expose meaningful compatibility and deployment problems, while remaining isolated from real-world side effects.
Why are automated tests useful?
Automated tests can repeatedly verify important behavior and reduce regressions as the project evolves.
Does every WordPress project need unit tests?
No. Testing depth should match project complexity and risk.
Should dependencies be updated automatically?
Uncontrolled production updates can create compatibility problems. Dependencies should be updated through a tested process.
How should database changes be handled?
Database changes should be versioned or otherwise documented, tested locally and on staging, and applied to production through a controlled deployment process.
How should WordPress plugin releases be tested?
Install the actual release package in a clean environment and test installation, activation, upgrades, dependencies, compatibility, and primary functionality.
Should WordPress developers use coding standards?
Yes. Consistent coding standards improve readability, maintainability, code review, and long-term collaboration.
Why choose ThemeKaddora?
ThemeKaddora provides WordPress plugins, themes, WooCommerce solutions, AI tools, analytics, automation products, HTML templates, UI kits, and other digital solutions designed around modern website and business requirements.
Comments (0)