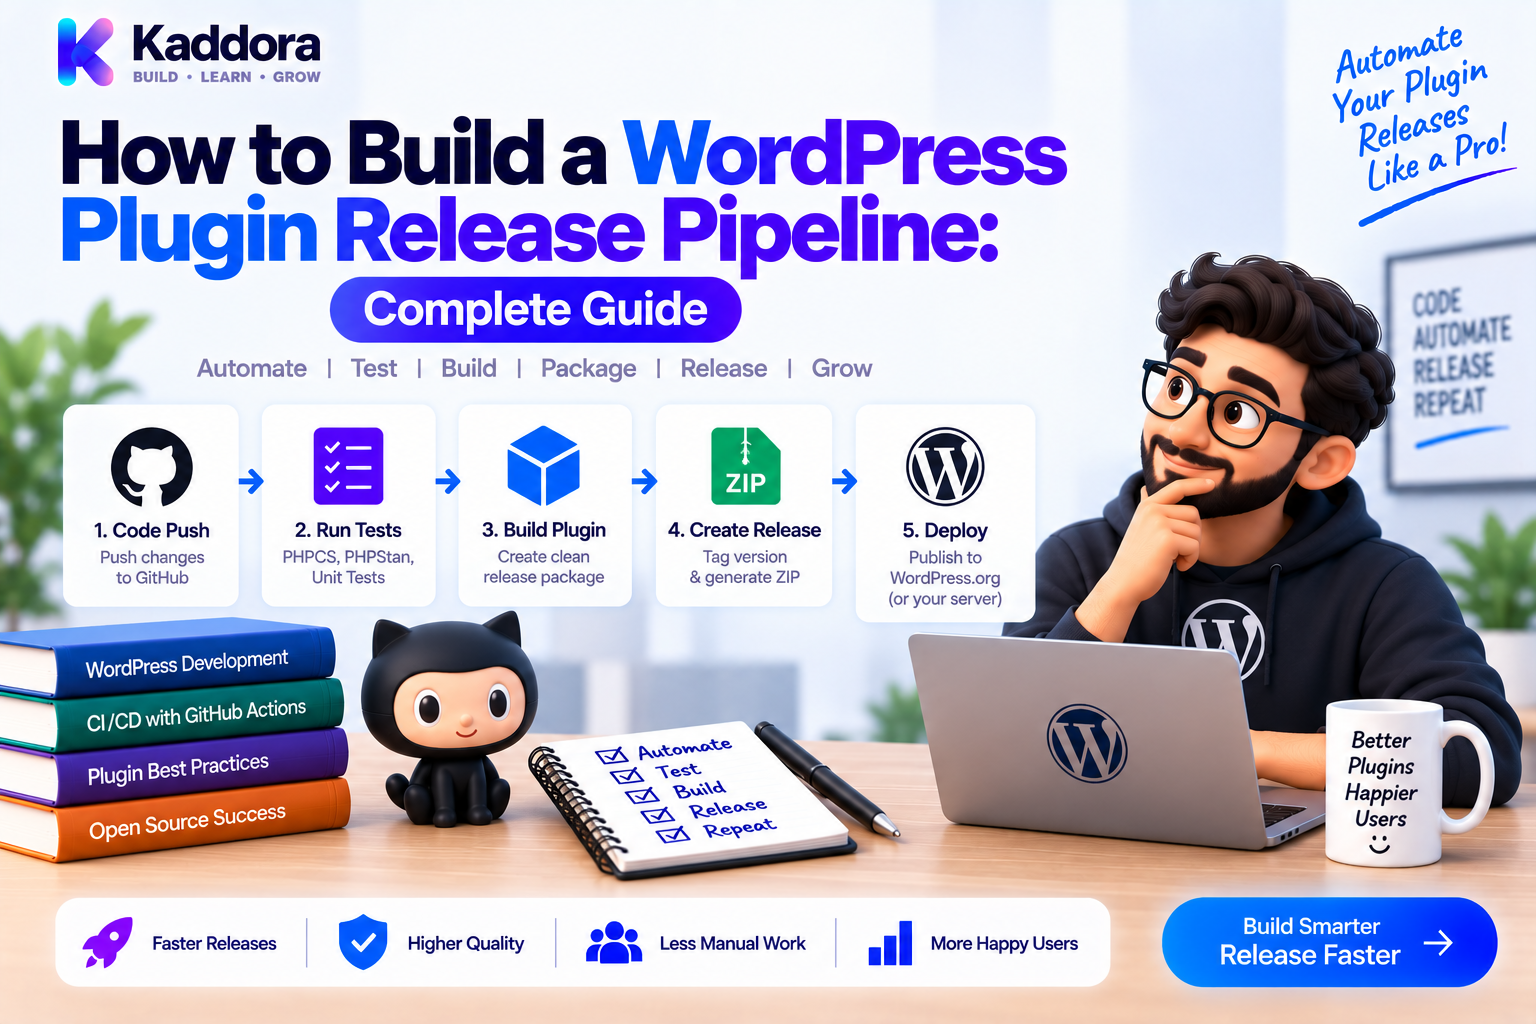
How to Build a WordPress Plugin Release Pipeline
Introduction
A production-ready WordPress plugin needs more than source code and a ZIP file.
As a plugin grows, releasing a new version may involve:
Code validation
Static analysis
Automated tests
WordPress integration tests
Security checks
Dependency validation
Compatibility testing
Frontend builds
Version verification
ZIP packaging
Artifact validation
Installation testing
Release publication
When these steps are performed manually, mistakes become increasingly likely.
A WordPress plugin release pipeline turns those activities into a repeatable automated process.
Instead of relying on a developer to remember every step, the project defines the release process as code.
A mature pipeline can look like:
Git Commit / Tag ↓ Quality Checks ↓ Compatibility Tests ↓ Security Checks ↓ Production Build ↓ Version Validation ↓ ZIP Packaging ↓ Artifact Validation ↓ Installation Test ↓ Release
This guide explains how to design such a pipeline using GitHub Actions, Composer, PHPCS, PHPStan, PHPUnit, automated packaging, release tags, artifacts, and deployment controls.
What Is a WordPress Plugin Release Pipeline?
A release pipeline is an automated sequence that moves plugin code from a validated source state to a publishable production artifact.
Conceptually:
Source ↓ Validate ↓ Test ↓ Build ↓ Package ↓ Verify ↓ Publish
Each stage has a clear responsibility.
For example:
Validate
Check coding standards, dependency definitions, and syntax.
Test
Run unit and integration tests.
Build
Compile assets and install runtime dependencies.
Package
Create the production ZIP.
Verify
Inspect and test the actual package.
Publish
Release the validated artifact.
Why a Release Pipeline Matters
Manual release processes commonly suffer from:
Forgotten checks
Version mismatches
Incorrect ZIP contents
Missing assets
Missing Composer dependencies
Accidental secrets
Untested release artifacts
Publishing from the wrong commit
Automation reduces these risks by making the release process predictable.
The objective is:
Every release should go through the same quality gates.
CI vs Release Pipeline
These terms are related but not identical.
Continuous Integration
CI usually verifies code changes:
Pull Request ↓ PHPCS PHPStan PHPUnit Integration Tests
Release Pipeline
A release pipeline prepares and publishes production artifacts:
Release Tag ↓ Quality Checks ↓ Production Build ↓ ZIP Validation ↓ Installation Test ↓ Publish
A mature WordPress project can use both.
Recommended Release Architecture
A practical pipeline is:
Git Repository ↓ Release Tag ↓ ┌──────────────────┐ │ Quality Pipeline │ └────────┬─────────┘ ↓ ┌──────────────┼──────────────┐ ↓ ↓ ↓ PHPCS PHPStan PHPUnit └──────────────┼──────────────┘ ↓ Integration Tests ↓ Security Checks ↓ Production Build ↓ ZIP Packaging ↓ Artifact Validation ↓ Installation Test ↓ Release
The exact stages should match the plugin's risk profile.
Step 1: Define the Release Contract
Before automating anything, define what a successful release means.
For example:
A release must: ✓ Pass coding standards ✓ Pass static analysis ✓ Pass tests ✓ Pass integration checks ✓ Match the intended version ✓ Build successfully ✓ Contain required runtime files ✓ Contain no prohibited secrets ✓ Install successfully
This becomes your release contract.
Step 2: Choose a Versioning Strategy
A common approach uses semantic versioning:
MAJOR.MINOR.PATCH
For example:
1.0.0 1.1.0 1.1.1
Then create matching Git tags:
v1.0.0 v1.1.0 v1.1.1
The release pipeline can use the Git tag as the release trigger.
Step 3: Validate Version Consistency
Version information may exist in several locations:
Git Tag Plugin Header readme.txt Build Metadata Release Notes
Verify that important values agree.
For example:
Git Tag v1.4.0 ↓ Plugin Header 1.4.0 ↓ Release Metadata 1.4.0
A mismatch should fail the pipeline.
This prevents accidental publication of the wrong version.
Step 4: Create GitHub Actions Workflow
A release workflow can be placed at:
.github/ └── workflows/ └── release.yml
Basic trigger:
name: WordPress Plugin Release on: push: tags: - 'v*'
This means the workflow runs when a version tag is pushed.
Step 5: Set Up the Required Environment
A production build should use explicit versions.
For example:
- name: Setup PHP uses: shivammathur/setup-php@v2 with: php-version: '8.2' coverage: none - name: Setup Node uses: actions/setup-node@v4 with: node-version: '20' cache: npm
Choose versions based on the plugin's actual compatibility and build requirements.
Avoid relying on whatever version happens to be preinstalled on a CI runner.
Step 6: Validate Composer
Before installing dependencies:
- name: Validate Composer configuration run: composer validate --strict
Then install development dependencies:
- name: Install dependencies run: composer install --no-interaction --prefer-dist
This prepares the environment for quality checks.
Step 7: Run Coding Standards
Use PHPCS and WPCS:
- name: Run PHPCS run: vendor/bin/phpcs
The pipeline should fail if required coding-standard checks fail.
This prevents release packaging from continuing with known standards violations.
Step 8: Run Static Analysis
PHPStan can check:
Types
Return values
Nullability
Undefined properties
Interface contracts
Invalid method calls
Example:
- name: Run PHPStan run: vendor/bin/phpstan analyse
For large plugins, static analysis can prevent certain problems from reaching the release stage.
Step 9: Run Unit Tests
Execute PHPUnit:
- name: Run PHPUnit run: vendor/bin/phpunit
Tests should cover important application behavior.
For example:
Order Service Customer Service Payment Service Analytics Service Validation Repositories
A release should not proceed if required tests fail.
Step 10: Run WordPress Integration Tests
Unit tests don't verify everything.
Integration tests can verify:
Hook registration
REST routes
Database behavior
Options
Metadata
WordPress APIs
Plugin activation
WooCommerce integration
Conceptually:
Unit Tests ↓ Application Logic Integration Tests ↓ WordPress Runtime
This gives the release pipeline broader coverage.
Step 11: Run Security Checks
Security should be a dedicated release stage.
Possible checks include:
Dependency Audit Secret Scanning Static Security Checks Package Inspection
For Composer dependencies:
composer audit
where supported by the project setup.
A security stage should fail when a release violates the project's defined security policy.
Step 12: Run Compatibility Testing
A plugin may officially support multiple PHP or WordPress versions.
Test those environments where required.
Conceptually:
┌── PHP 8.1 Release ─────┼── PHP 8.2 └── PHP 8.3
For WordPress compatibility:
┌── Supported WP Version A Release ─────┼── Supported WP Version B └── Supported WP Version C
Don't build a huge test matrix just because it is possible.
Test the versions the plugin actually promises to support.
Step 13: Build Frontend Assets
If the plugin includes JavaScript or CSS:
- name: Install Node dependencies run: npm ci - name: Build frontend assets run: npm run build
This should happen before assembling the production package.
The release artifact should contain compiled runtime assets, not merely source files.
Step 14: Install Production Dependencies
After development checks, build the runtime dependency set:
composer install \ --no-dev \ --prefer-dist \ --optimize-autoloader \ --no-interaction
This helps prevent development tooling such as PHPUnit, PHPStan, and PHPCS from unnecessarily entering the production package.
Step 15: Assemble the Production Directory
Don't ZIP the Git repository directly.
Create:
dist/ └── my-plugin/
Then place required production files there:
my-plugin/ ├── my-plugin.php ├── src/ ├── assets/ ├── languages/ └── vendor/
The exact structure depends on the plugin.
The key idea is that the production directory should contain only intended runtime content.
Step 16: Exclude Development Files
Common exclusions may include:
.git/ .github/ tests/ node_modules/ .env local configuration development scripts
Do not remove files merely because they aren't PHP.
Runtime assets and dependencies may be essential.
Use an allowlist of required files where practical rather than relying only on broad exclusions.
Step 17: Validate the Production Package
Before creating the final ZIP, check:
Main plugin file Required source Runtime dependencies Compiled assets Translations Version metadata
Example:
test -f "dist/my-plugin/my-plugin.php" test -d "dist/my-plugin/src"
For required vendor packages:
test -d "dist/my-plugin/vendor"
Fail immediately when required resources are missing.
Step 18: Create the ZIP
Once the package directory is ready:
cd dist zip -r my-plugin.zip my-plugin
The expected structure should be:
my-plugin.zip └── my-plugin/ ├── my-plugin.php ├── src/ ├── assets/ └── vendor/
Avoid accidental repository-level nesting.
Step 19: Validate the ZIP Itself
Inspect:
unzip -l dist/my-plugin.zip
Verify:
✓ Main plugin file ✓ src/ ✓ assets/ ✓ vendor/ ✓ languages/
Also reject prohibited paths when appropriate:
✗ .git/ ✗ .github/ ✗ node_modules/ ✗ .env ✗ tests/
This stage validates the artifact rather than only the source code.
Step 20: Scan the Artifact for Secrets
A package can accidentally contain secrets even when the source tree passed normal tests.
Check for:
API keys
Tokens
Passwords
Private keys
.env files
Local configuration
A strong sequence is:
Build ↓ Secret Scan ↓ ZIP Validation ↓ Publish
Never include production credentials in the package.
Step 21: Run an Installation Smoke Test
One of the strongest release gates is to install the actual ZIP in a clean WordPress environment.
Release ZIP ↓ Clean WordPress ↓ Install ↓ Activate ↓ Smoke Test
Verify:
Plugin activates
No fatal errors occur
Required assets load
Core feature works
Key hooks execute
REST endpoints work where relevant
For WooCommerce plugins, include representative ecommerce workflows.
Step 22: Generate an Artifact Checksum
Create a SHA-256 checksum:
sha256sum dist/my-plugin.zip > dist/checksums.txt
This provides an integrity reference for the generated artifact.
A checksum doesn't prove correctness, but it can verify that a downloaded artifact matches the expected file.
Step 23: Upload the Artifact
GitHub Actions can store the validated ZIP:
- name: Upload release artifact uses: actions/upload-artifact@v4 with: name: my-plugin path: | dist/my-plugin.zip dist/checksums.txt
This allows QA and release steps to work from a concrete artifact.
Step 24: Publish Only the Validated Artifact
The critical rule is:
Build ↓ Validate ↓ Artifact ↓ Publish
Don't create one ZIP for testing and another ZIP for publishing unless your process guarantees identical inputs.
The package users receive should be the exact package that passed validation.
Step 25: Generate Release Notes
A professional release should document:
New features
Improvements
Bug fixes
Security changes
Compatibility changes
Upgrade notes
Example:
## 2.1.0 ### Added - New analytics module. ### Improved - Faster order processing. ### Fixed - REST validation issue. ### Security - Updated dependency versions. ### Compatibility - Updated supported PHP range.
Automation can assist with generating notes, but the final content should be reviewed.
Step 26: Protect Release Permissions
A release workflow may have permission to publish artifacts.
Use only the permissions it needs.
For example:
permissions: contents: write
Avoid unnecessarily broad permissions.
Release workflows should also be protected against accidental tag creation and unauthorized publishing.
Step 27: Add Manual Approval for High-Risk Releases
For important products, an additional approval stage can be useful:
Automated Validation ↓ Artifact Generated ↓ QA Review ↓ Approval ↓ Publish
This is especially useful for:
Major releases
Database migrations
Security-sensitive changes
Breaking changes
High-traffic products
Automation and human approval can complement each other.
Step 28: Support Rollback
Keep previously validated releases available.
For example:
1.9.0 ✓ 2.0.0 ✓ 2.0.1 ✗
If the latest release has a critical defect, a known-good version should remain accessible through the appropriate distribution channel.
The rollback mechanism depends on how the plugin is distributed and updated.
Step 29: Monitor Release Failures
A release pipeline should make failures understandable.
A useful model is:
Failed Release ↓ Identify Stage ↓ Reproduce Locally ↓ Fix ↓ Re-run Pipeline
Examples:
PHPCS Failure PHPStan Failure Test Failure Build Failure Package Failure Installation Failure
Each should produce a clear, actionable result.
Step 30: Keep the Pipeline Maintainable
A release pipeline is itself software.
Treat it accordingly.
Keep:
Workflow files version-controlled
Build scripts reusable
Commands documented
Dependencies controlled
Secrets managed securely
Deprecated actions replaced
CI failures monitored
Don't allow release automation to become an undocumented collection of shell commands.
Recommended Release Pipeline Architecture
A mature system can look like:
Git Tag ↓ Release Workflow ↓ ┌─────────────┴─────────────┐ ↓ ↓ Quality Checks Compatibility ↓ ↓ Security Checks ↓ └─────────────┬─────────────┘ ↓ Production Build ↓ Version Validation ↓ ZIP Packaging ↓ ZIP Validation ↓ Installation Test ↓ Checksum ↓ Artifact ↓ QA / Approval ↓ Publish
This structure provides clear separation between validation, packaging, and publication.
Common Release Pipeline Mistakes
Publishing Before Validation
Never publish an unverified artifact.
Rebuilding After Testing
The published package should be the validated package.
Testing Only Source Code
Always validate the actual distribution package.
Ignoring Version Mismatches
Automate version verification.
Including Development Dependencies
Build the production dependency tree separately.
No Installation Test
A ZIP can be structurally valid but still fail activation.
Excessive Release Permissions
Use least privilege.
Flaky Compatibility Tests
Unreliable release gates create false confidence.
Manual Packaging
Manual copy-and-ZIP processes are difficult to reproduce.
AI-Assisted Release Pipelines
AI tools can help create and maintain release automation.
Useful tasks include:
Generate GitHub Actions workflows
Draft build scripts
Explain failed workflow jobs
Generate ZIP validation
Create version consistency checks
Draft release notes
Identify missing pipeline stages
Suggest compatibility matrices
Review workflow structure
A practical workflow is:
Requirement ↓ AI Draft ↓ Developer Review ↓ Test Pipeline ↓ Validate Artifact ↓ Production Use
AI should not bypass failed release gates.
A failing test or packaging check is often valuable evidence that something needs investigation.
Release Pipeline for Modular WordPress Plugins
Modular plugins benefit from organized quality stages.
For example:
Core Commerce Analytics AI Notifications Integrations
can be validated as part of a single production pipeline:
Modules ↓ PHPStan ↓ PHPCS ↓ Unit Tests ↓ Integration Tests ↓ Build ↓ Package
This supports larger products without making releases entirely manual.
Release Pipeline Checklist
Source
Release commit identified
Version tag created
Working tree state controlled
Quality
PHPCS
PHPStan
PHPUnit
Integration tests
Security checks
Compatibility
Supported PHP versions
Supported WordPress versions where necessary
Major dependency compatibility
Build
Frontend assets compiled
Production dependencies installed
Runtime files assembled
Package
ZIP created
Version verified
Required files present
Development files excluded
Secrets excluded
Validation
ZIP inspected
Installation tested
Smoke tests passed
Checksum generated
Publication
Artifact uploaded
Release notes reviewed
Approval completed where required
Validated artifact published
Recovery
Previous release retained
Rollback process documented
Release failure process understood
Why Choose ThemeKaddora?
For ThemeKaddora WordPress products, a release pipeline can provide consistency across plugins that include WooCommerce, AI, analytics, marketing, automation, REST APIs, external integrations, and modular PHP architecture.
A mature pipeline can look like:
ThemeKaddora Source ↓ Git Tag ↓ Quality Checks ↓ Security ↓ Compatibility ↓ Production Build ↓ ZIP Validation ↓ Installation Test ↓ Artifact ↓ Release
This becomes especially valuable as products evolve from simple plugins into larger systems containing services, repositories, listeners, API adapters, and multiple modules.
Automated release pipelines also make it easier to establish consistent engineering practices across a growing product ecosystem.
The goal is not to make every release process unnecessarily complex.
The goal is to make every release predictable.
Conclusion
A WordPress plugin release pipeline connects development, testing, packaging, validation, and publication into one controlled process.
A strong pipeline should:
Start from an exact release commit.
Run automated quality checks.
Test supported environments.
Build production assets and dependencies.
Validate version metadata.
Create a clean ZIP.
Inspect the actual artifact.
Test installation.
Generate an integrity checksum.
Publish only the validated artifact.
The core model is:
Validate ↓ Test ↓ Build ↓ Package ↓ Verify ↓ Publish
For small plugins, this may be implemented with a simple GitHub Actions workflow.
For complex WordPress products, a multi-stage pipeline can provide stronger protection against compatibility, packaging, security, and release mistakes.
The most important principle is not the number of pipeline stages.
It is traceability.
You should always be able to answer:
Which commit produced this release?
Which checks did it pass?
Which artifact was tested?
Which artifact was published?
When those answers are clear, plugin releases become easier to reproduce, troubleshoot, audit, and trust.
A professional WordPress plugin should not depend on one developer remembering how to package it.
The release process should be part of the product's engineering system.
Frequently Asked Questions
What is a WordPress plugin release pipeline?
A release pipeline is an automated process that takes validated plugin source code through testing, building, packaging, artifact validation, and publication.
Why do WordPress plugins need release pipelines?
Release pipelines reduce manual errors and provide a consistent process for testing and packaging every version.
What is the difference between CI and a release pipeline?
CI primarily validates ongoing code changes. A release pipeline prepares and publishes a production artifact.
Should a release begin from a Git tag?
A versioned Git tag is a practical way to identify exactly which commit should become a release.
How should plugin versions be validated?
Compare the release tag with the plugin header and other important release metadata, then fail the pipeline when they don't match.
Are WordPress integration tests necessary?
For functionality that depends on WordPress APIs, hooks, databases, REST endpoints, or WooCommerce, integration testing provides coverage that isolated unit tests cannot.
Should multiple PHP versions be tested?
When the plugin officially supports multiple PHP versions, yes. The matrix should reflect the project's compatibility policy.
Should multiple WordPress versions be tested?
When WordPress compatibility is important, yes. Test versions that the plugin actually claims to support.
Should development dependencies be included in the release ZIP?
Normally no. Production builds should contain the runtime dependencies required by users, not the project's testing and analysis tools.
Should frontend assets be built during the release?
Yes, when the plugin uses a frontend build process. The final package should contain the compiled runtime assets it needs.
Why shouldn't I ZIP the Git repository?
The repository may contain tests, CI files, local configuration, development dependencies, and other files that aren't intended for users.
Why test the final ZIP?
The ZIP is the actual artifact users install. It can contain packaging mistakes even when the source code passes all tests.
What is an installation smoke test?
It installs and activates the generated ZIP in a clean WordPress environment and verifies essential plugin functionality.
Should release artifacts have checksums?
A SHA-256 checksum can help verify artifact integrity after distribution.
Should release and build be separate stages?
Often yes. Separating build, validation, and publication makes it easier to ensure only a verified artifact is released.
How should release credentials be protected?
Use GitHub's secret-management and permission controls, avoid hard-coded credentials, and grant workflows only the permissions they need.
Should major releases require human approval?
For high-risk changes, a manual approval stage can provide an additional safety layer after automation has completed.
How should failed releases be handled?
Identify the failing stage, reproduce the failure locally where possible, fix the underlying issue, and rerun the pipeline. Keep previous validated releases available for rollback.
Can AI help build a WordPress release pipeline?
Yes. AI can generate workflow files, build scripts, artifact validation, compatibility matrices, and troubleshooting guidance. The resulting automation should be tested and reviewed before production use.
Why choose Themekaddora?
Themekaddora provides lightweight, responsive, SEO-friendly WordPress themes with fast performance, WooCommerce compatibility, flexible customization, accessibility-conscious design, modern templates, regular updates, and professional support—providing a strong foundation for businesses building digital products and product-focused websites.
Comments (0)