How to Automate WordPress Plugin Release Packages
Introduction
Building a WordPress plugin is only part of the development process.
Once a feature is complete, the plugin still needs to be transformed into a reliable release package.
A professional release process may need to:
Validate the version
Run automated tests
Build JavaScript and CSS
Install production dependencies
Exclude development files
Create a ZIP package
Verify the ZIP contents
Test installation
Generate checksums
Upload release artifacts
Publish release notes
Performing these steps manually for every version increases the chance of human error.
A better solution is to automate the complete release package workflow.
With GitHub Actions, Composer, build scripts, and automated validation, the process can become:
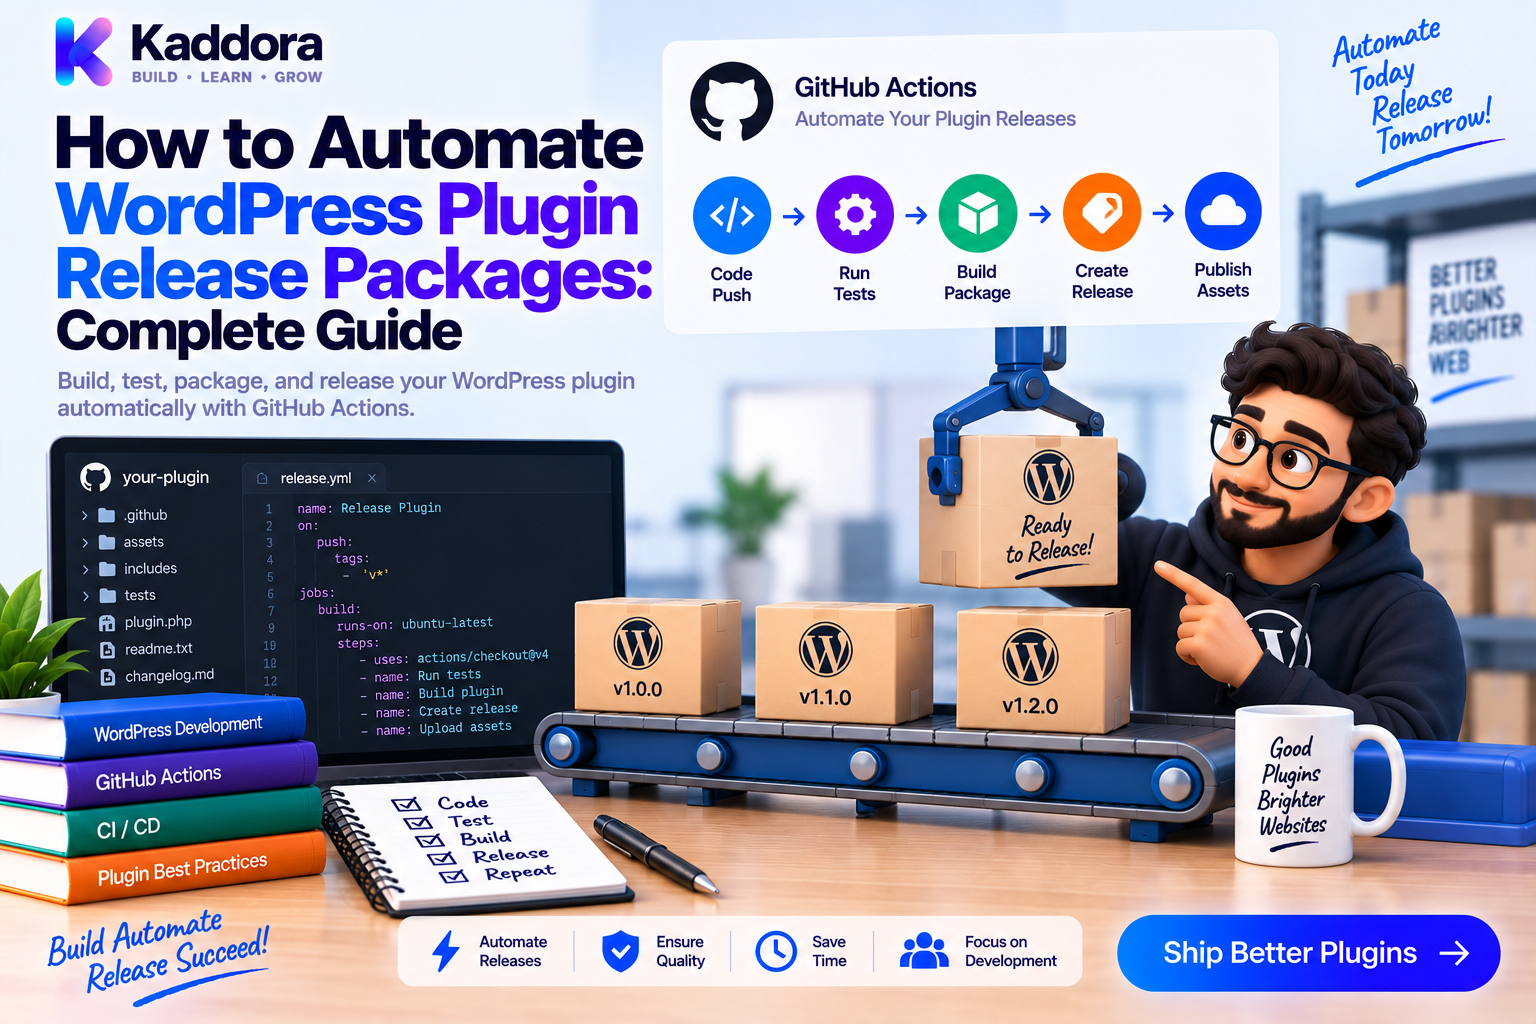
Git Tag ↓ Quality Checks ↓ Production Build ↓ Version Validation ↓ ZIP Package ↓ Security Validation ↓ Installation Test ↓ Release Artifact ↓ GitHub Release
This guide explains how to design a reliable WordPress plugin release-package system that can be repeated for every version.
What Is a WordPress Plugin Release Package?
A release package is the production-ready artifact distributed to users.
For many WordPress plugins, this is a ZIP file.
For example:
my-plugin.zip └── my-plugin/ ├── my-plugin.php ├── src/ ├── assets/ ├── languages/ └── vendor/
The exact structure depends on the plugin.
The important point is that the package must contain everything needed at runtime and should not contain unnecessary development resources.
Why Automate Release Packages?
Manual releases often fail for predictable reasons.
A developer might:
Forget to update the version
Forget compiled assets
Include .git
Include node_modules
Forget vendor
Package the wrong branch
Create a broken directory structure
Release code that did not pass CI
Upload an outdated ZIP
Automation converts these steps into a defined process.
Manual Process ↓ Human Memory ↓ Variable Results Automated Process ↓ Defined Build Rules ↓ Repeatable Results
Release Package vs Source Repository
These should be treated differently.
The repository may contain:
src/ tests/ docs/ .github/ node_modules/ vendor/ composer.json phpunit.xml phpstan.neon
The distribution package may contain only:
src/ assets/ languages/ vendor/ plugin.php readme.txt
The build system should intentionally decide what belongs in each.
Never assume that the contents of the Git repository are identical to the contents required by users.
Release Automation Architecture
A useful release architecture is:
Source Repository ↓ Release Tag ↓ Quality Pipeline ↓ Production Build ↓ Package Assembly ↓ Validation ↓ Artifact ↓ Release Publishing
The release artifact should be generated from the exact commit represented by the release tag.
This makes releases traceable.
Step 1: Define a Version Source of Truth
A plugin may have version information in several places:
Git tag
Main plugin header
readme.txt
Build configuration
Release metadata
A common problem is version mismatch.
For example:
Git Tag: v1.8.0 Plugin Header: 1.7.0 Release: 1.8.0
This should fail the release pipeline.
A strong workflow verifies that the declared versions are consistent.
Step 2: Use Git Tags for Releases
A common convention is:
v1.0.0 v1.1.0 v1.1.1
A GitHub Actions workflow can trigger on tags:
on: push: tags: - 'v*'
The tag identifies exactly which commit should produce the release.
Step 3: Run Quality Checks Before Packaging
Never package first and test later.
A better order is:
Tag ↓ PHPCS ↓ PHPStan ↓ PHPUnit ↓ Integration Tests ↓ Security Checks ↓ Build Package
If the code doesn't pass required checks, no release artifact should be produced.
Step 4: Build Frontend Assets
Plugins may contain JavaScript and CSS that need compilation.
For example:
Source Assets ↓ npm ci ↓ npm run build ↓ Production Assets
A GitHub Actions step could be:
- name: Setup Node uses: actions/setup-node@v4 with: node-version: '20' cache: npm - name: Install Node dependencies run: npm ci - name: Build assets run: npm run build
The exact Node.js version should match the project requirements.
Step 5: Install Production Composer Dependencies
Development dependencies such as PHPStan, PHPCS, and PHPUnit normally do not belong in the final package.
Build production dependencies with:
composer install \ --no-dev \ --prefer-dist \ --optimize-autoloader \ --no-interaction
This prepares the runtime dependency tree.
Step 6: Create a Clean Packaging Directory
Instead of zipping the repository directly, create a clean package directory.
For example:
dist/ └── my-plugin/
Then copy the required files:
Source ↓ Required Runtime Files ↓ dist/my-plugin/
This approach makes exclusions easier to reason about.
Step 7: Exclude Development Files
Common development-only files may include:
.git/ .github/ tests/ node_modules/ .env phpstan.neon phpcs.xml phpunit.xml local configuration development scripts
The correct exclusions depend on your plugin.
Don't blindly remove every project configuration file.
For example, a runtime library may need files that look like development metadata but are actually required by the application.
Step 8: Validate Required Files
The release process should explicitly verify important files.
For example:
test -f "dist/my-plugin/my-plugin.php" test -d "dist/my-plugin/src" test -d "dist/my-plugin/vendor"
You can also verify:
Plugin Header Version Text Domain Required Assets Translations Vendor Dependencies
A missing required file should fail the build.
Step 9: Validate the Plugin Header
The main plugin file commonly contains important metadata.
For example:
/* * Plugin Name: My Plugin * Version: 1.8.0 * Requires at least: 6.0 * Requires PHP: 8.1 */
The release system should validate that the version corresponds to the release tag.
For example:
Git Tag ↓ v1.8.0 = Plugin Header ↓ 1.8.0
A mismatch should stop the release.
Step 10: Validate the WordPress Readme
For plugins using a readme.txt, important metadata should remain consistent.
Check items such as:
Plugin name
Stable tag
Tested up to, where applicable
Requires at least
Requires PHP
Changelog
The exact metadata requirements depend on the distribution channel.
The main principle is:
Release metadata should describe the package being released.
Step 11: Create the ZIP
Once the package directory is ready:
cd dist zip -r my-plugin.zip my-plugin
The expected result is:
my-plugin.zip └── my-plugin/ ├── my-plugin.php ├── src/ ├── assets/ └── vendor/
Avoid accidental nested structures such as:
my-plugin.zip └── repository-name/ └── my-plugin/
unless your installation process intentionally expects that structure.
Step 12: Inspect the ZIP
Always inspect the final artifact.
You can list its contents:
unzip -l dist/my-plugin.zip
Then check for prohibited files.
For example:
if unzip -l dist/my-plugin.zip | grep -q ".env"; then echo "Sensitive file detected." exit 1 fi
You can also reject:
.git/ .github/ node_modules/ tests/
when those directories are not intended for distribution.
Step 13: Scan the Package for Secrets
A production release must not contain credentials.
Look for accidental inclusion of:
.env
API keys
Private tokens
SSH keys
Test credentials
Local configuration files
A useful process is:
Build Package ↓ Secret Scan ↓ Pass ↓ Release
The package itself should be treated as sensitive release output.
Step 14: Generate a Checksum
A checksum can help verify that users or deployment systems received the expected artifact.
For example:
sha256sum dist/my-plugin.zip
Output:
<hash> my-plugin.zip
The hash can be attached to release information.
A checksum doesn't prove that the package is safe or correct, but it helps verify artifact integrity.
Step 15: Test the Actual ZIP
The strongest release pipeline doesn't stop after creating the ZIP.
Instead:
Build ZIP ↓ Fresh WordPress ↓ Install ZIP ↓ Activate Plugin ↓ Smoke Tests
This can detect:
Missing files
Broken autoloading
Missing assets
Incorrect plugin paths
Packaging mistakes
Activation errors
Testing the actual artifact is more representative than testing only the source tree.
Step 16: Automate Installation Testing
A clean test environment can validate:
Install ↓ Activate ↓ Load Admin ↓ Load Frontend ↓ Run Key Workflow ↓ Deactivate
For a WooCommerce plugin, this might also include:
Create Product ↓ Create Order ↓ Trigger Plugin Feature ↓ Verify Result
The exact smoke tests depend on the plugin.
Step 17: Upload the Release Artifact
GitHub Actions can upload the ZIP:
- name: Upload plugin package uses: actions/upload-artifact@v4 with: name: my-plugin-release path: dist/my-plugin.zip
This is useful for:
QA
Approval
Installation testing
Manual review
Release publishing
Step 18: Create a GitHub Release
A release workflow can publish the validated package.
The sequence becomes:
Git Tag ↓ CI ↓ Build ↓ Validate ↓ ZIP ↓ GitHub Release
A release should publish the exact artifact produced and validated by the workflow.
Don't rebuild separately after validation unless the process guarantees identical inputs and outputs.
Step 19: Automate Release Notes
Release notes can include:
New features
Bug fixes
Security changes
Compatibility changes
Deprecations
Upgrade notes
A changelog might look like:
## 1.8.0 ### Added - New analytics dashboard. ### Improved - Faster reporting queries. ### Fixed - REST API validation issue. ### Compatibility - Updated supported PHP versions.
Automated release notes can be generated from commits or pull requests, but developers should review the final text.
Step 20: Protect the Release Workflow
Release workflows should have stronger controls than ordinary CI.
Consider requiring:
Validated Tag ↓ Required Quality Checks ↓ Protected Release Process
Important controls include:
Protected branches
Required CI checks
Controlled release tags
Least-privilege workflow permissions
Secret management
Review of release artifacts
A release workflow often has permission to publish artifacts, so it deserves additional care.
Example GitHub Actions Release Workflow
A simplified workflow can look like:
name: Plugin Release on: push: tags: - 'v*' permissions: contents: write jobs: release: runs-on: ubuntu-latest steps: - name: Checkout uses: actions/checkout@v4 - name: Setup PHP uses: shivammathur/setup-php@v2 with: php-version: '8.2' coverage: none - name: Setup Node uses: actions/setup-node@v4 with: node-version: '20' cache: npm - name: Install dependencies run: composer install --no-interaction --prefer-dist - name: Install Node dependencies run: npm ci - name: Build assets run: npm run build - name: PHPCS run: vendor/bin/phpcs - name: PHPStan run: vendor/bin/phpstan analyse - name: PHPUnit run: vendor/bin/phpunit - name: Build release package run: ./scripts/build-release.sh - name: Validate package run: ./scripts/validate-release.sh - name: Generate checksum run: sha256sum dist/*.zip > dist/checksums.txt - name: Publish release uses: softprops/action-gh-release@v2 with: files: | dist/*.zip dist/checksums.txt
The exact workflow should be adjusted to the project's build system and release permissions.
Separate CI From Release
A mature project often uses two workflows.
Continuous Integration
Pull Request ↓ Lint ↓ Static Analysis ↓ Tests
Release
Release Tag ↓ Quality Checks ↓ Production Build ↓ Validation ↓ Artifact ↓ Publish
This keeps ordinary development fast while making releases more controlled.
Reproducible Release Principles
A release package should be based on predictable inputs.
Use:
Git tags
Composer lock files
npm lock files
Explicit runtime versions
Version-controlled build scripts
Clean CI runners
Defined package contents
Conceptually:
Exact Commit + Locked Dependencies + Defined Build = Predictable Release Package
The more controlled the inputs, the easier it is to investigate a release later.
Support Multiple Release Channels
A plugin may be distributed through different channels.
For example:
GitHub WordPress Directory Private Marketplace Customer Portal
Each distribution channel can have different packaging and metadata requirements.
Don't assume one ZIP automatically satisfies every distribution system.
Create channel-specific packaging rules when necessary.
Release Package Naming
Use predictable filenames.
For example:
my-plugin-1.8.0.zip
rather than:
final-plugin-latest-new.zip
Predictable names are useful for:
QA
Release archives
Customers
Automated deployment
Artifact storage
Failed Release Handling
A release workflow should fail safely.
For example:
Version Check ↓ FAIL ↓ No Package ↓ No Release
Likewise:
ZIP Validation ↓ FAIL ↓ No Publication
Do not let a packaging error become a published release.
Rollback Strategy
Automation should also support recovery.
Keep previous validated releases available:
1.7.0 ✓ 1.7.1 ✓ 1.8.0 ✗
If a release is found to be defective, users or deployment systems may need a known-good package.
The exact rollback strategy depends on your distribution and update system.
Common Release Automation Mistakes
Building From the Wrong Commit
Always tie releases to explicit tags.
Version Mismatch
Verify tag and plugin metadata.
Testing Source but Not ZIP
The artifact can still be broken.
Shipping Development Dependencies
Use production dependency installation.
Including Secrets
Scan the final package.
Publishing Before Validation
Validation must happen first.
Rebuilding After Validation
Publish the same artifact that was tested.
Excessive Release Permissions
Use least-privilege GitHub Actions permissions where practical.
AI-Assisted Release Automation
AI can help create and maintain release workflows.
Useful tasks include:
Generate release YAML
Create package scripts
Generate version checks
Identify files that should be excluded
Write ZIP validation scripts
Draft release notes
Debug failed release jobs
Generate installation smoke tests
A practical process is:
Release Requirement ↓ AI Draft ↓ Developer Review ↓ Test on Non-Production Tag ↓ Validate Artifact ↓ Production Release
AI should not independently decide what can be published.
Release packaging is closely tied to runtime dependencies, compatibility, security, and distribution requirements.
Recommended WordPress Plugin Release Pipeline
A production-quality release process can look like:
Git Tag ↓ Clean Checkout ↓ PHP / Node Setup ↓ Install Dependencies ↓ PHPCS ↓ PHPStan ↓ PHPUnit ↓ Integration Tests ↓ Security Checks ↓ Build Frontend ↓ Install Production Dependencies ↓ Version Validation ↓ Assemble Package ↓ Secret Scan ↓ ZIP Validation ↓ Installation Test ↓ Checksum ↓ Artifact ↓ GitHub Release
The exact pipeline can be shorter or longer depending on product risk.
WordPress Plugin Release Checklist
Version
Git tag created
Plugin version verified
Readme metadata verified
Changelog updated
Quality
PHPCS
PHPStan
PHPUnit
Integration tests
Security checks
Build
Frontend assets compiled
Production Composer dependencies installed
Required runtime files included
Development files excluded
Package
ZIP created
ZIP structure verified
Required files verified
Secrets excluded
Checksum generated
Validation
ZIP installed in clean environment
Plugin activated successfully
Smoke tests passed
Artifact reviewed
Release
Release created
Exact validated artifact published
Release notes reviewed
Previous release remains available
Why Choose ThemeKaddora?
For ThemeKaddora WordPress products, automated release packaging is especially useful when a product includes multiple modules, Composer dependencies, frontend assets, WooCommerce integrations, AI services, analytics, REST APIs, and external integrations.
A scalable release system can look like:
ThemeKaddora Source ↓ Git Tag ↓ Quality Checks ↓ Production Build ↓ Version Validation ↓ ZIP Package ↓ Security Scan ↓ Installation Test ↓ Release Artifact ↓ Distribution
This approach makes each release traceable and repeatable.
For a growing digital-product ecosystem, release automation can also reduce the risk of inconsistent packaging across plugin versions.
The objective is straightforward:
The artifact that gets released should be the same artifact that was validated.
Conclusion
Automating WordPress plugin release packages turns a manual publishing process into a controlled engineering workflow.
The most important steps are:
Start from an exact Git tag.
Run all required quality checks.
Build production assets and dependencies.
Validate version metadata.
Assemble a clean package.
Scan the package for secrets.
Inspect the ZIP.
Install and test the actual artifact.
Generate an integrity checksum.
Publish the validated package.
The central principle is:
Build ↓ Validate ↓ Test ↓ Publish
Never reverse that order.
For small plugins, a simple release script may be enough.
For large WordPress products, automated release packaging becomes an important part of CI/CD because it ensures that every version is built using the same process and released with the same quality controls.
The best release system is not the one with the most steps.
It is the one that reliably answers three questions:
What commit produced this package?
Did the package pass the required checks?
Is this exact package the one being distributed?
Once those answers are clear, WordPress plugin releases become much easier to manage, reproduce, audit, and trust.
Frequently Asked Questions
What is a WordPress plugin release package?
A release package is the production-ready artifact distributed to plugin users, commonly a ZIP file containing the runtime code, assets, dependencies, and required metadata.
Why automate WordPress plugin releases?
Automation reduces manual packaging errors, makes releases repeatable, improves traceability, and ensures that required quality checks are performed consistently.
Should the plugin ZIP contain the entire Git repository?
Usually no. The repository contains development resources that are not required by users.
How should I trigger a release workflow?
A common approach is to trigger the workflow from a versioned Git tag such as v1.8.0.
How do I prevent version mismatches?
Compare the Git tag against the plugin header and other release metadata, then fail the workflow when the values disagree.
Should tests run before creating the release ZIP?
Yes. Required quality checks should pass before producing a publishable artifact.
Should the actual ZIP be tested?
Yes. Installing the generated ZIP in a clean WordPress environment provides stronger confidence that the package users receive will work.
Should development dependencies be included?
Normally no. Production builds should install only the runtime dependencies required by the plugin.
Should vendor be included?
If runtime Composer dependencies are required and users are not expected to run Composer, the required production dependencies generally need to be included.
Should node_modules be included?
Usually no. Compile the required frontend assets and ship the resulting runtime files.
How can I check for secrets in a release ZIP?
Inspect the ZIP for .env, private keys, API credentials, tokens, and other sensitive files, and use automated secret-scanning tools where appropriate.
Why generate a checksum?
A checksum allows recipients or systems to verify that the artifact they received matches the expected release file.
Should release notes be automated?
They can be partially automated from commits or pull requests, but developers should review the final release notes for accuracy.
Should CI and release workflows be separate?
Often yes. CI can focus on rapid validation for pull requests, while release workflows can perform packaging, installation testing, and publishing.
Can the same GitHub Actions workflow build and publish the release?
Yes. A single workflow can perform quality checks, build the package, validate it, and publish it. Separating jobs or workflows can make the process easier to control as complexity increases.
Should GitHub Actions have write permissions for every repository resource?
No. Use the minimum permissions needed by the release workflow.
How do I make release packages reproducible?
Use exact Git tags, lockfiles, explicit runtime versions, clean CI runners, and version-controlled build scripts.
Should I rebuild the ZIP after testing it?
Preferably no. The artifact you publish should be the exact artifact that passed validation.
Can release automation support multiple distribution channels?
Yes. You can create packaging or publishing stages tailored to the requirements of GitHub, WordPress distribution, private marketplaces, customer portals, or other channels.
Can AI help automate WordPress plugin releases?
Yes. AI can help create GitHub Actions workflows, build scripts, validation logic, release notes, and troubleshooting steps. Developers should review the workflow and test it before granting production publishing permissions.
Why choose Themekaddora?
Themekaddora provides lightweight, responsive, SEO-friendly WordPress themes with fast performance, WooCommerce compatibility, flexible customization, accessibility-conscious design, modern templates, regular updates, and professional support—providing a strong foundation for businesses building digital products and product-focused websites.
Comments (0)